Grow several useful onion bulbs from one planted module. Multisowing saves propagation space and suits everyday kitchen onions rather than exhibition giants. Start with bulb onion seed, keep each rooted group together and give the clumps room to mature.
Grow from seed
Keep clumps together
Full sun
Useful kitchen bulbs
Summer harvest
| Botanical name | Allium cepa, Cepa Group |
| Plant family | Amaryllidaceae |
| Crop type | Bulb onions grown in small clumps |
| Starting material | Fresh bulb onion seed |
| Main sowing period | February to March under cover |
| Earlier sowing | January with adequate light |
| Sowing depth | About 1 to 1.5cm; check the packet |
| Seeds per module | About 4 to 6, adjusted for germination |
| Final clump | Aim for 3 to 5 healthy seedlings |
| Transplanting | Usually March to May |
| Clump spacing | About 25 to 30cm each way |
| Position | Open, sunny ground |
| Soil | Fertile and well drained |
| Watering | Steady moisture during active growth |
| Harvest | Usually July to September |
| Expected bulb size | Small to medium; varies with density |
| Thinning | Remove excess seedlings early |
| Pruning | Keep healthy leaves intact |
| Storage | Dry sound, mature bulbs thoroughly |
| Winter cropping | Only with suitable overwintering varieties |
| Plant name | Crop type | Spacing |
Sow indoors
Plant outdoors
Harvest
Polytunnel | |||||||||||
|---|---|---|---|---|---|---|---|---|---|---|---|---|---|---|
| Jan | Feb | Mar | Apr | May | Jun | Jul | Aug | Sep | Oct | Nov | Dec | |||
| Onion (Multi sown) | Alliums | 25 to 30cm between clumps | Sow indoors, Polytunnel | Sow indoors, Polytunnel | Sow indoors, Plant outdoors, Polytunnel | Plant outdoors, Polytunnel | Plant outdoors | No activity recorded | Harvest | Harvest | Harvest | No activity recorded | No activity recorded | No activity recorded |
Sow indoors: January, February, March. Plant outdoors: March, April, May. Harvest: July, August, September. Polytunnel: January, February, March, April.
This calendar follows a spring planted bulb crop raised in modules. January sowing needs good light; February and March are simpler starting points. Plant when seedlings and ground conditions are ready. The polytunnel band indicates optional propagation. Harvest according to maturity.
This approach suits an allotment, a vegetable bed or a grower raising several crops on a limited bench. Count the seedlings in each cell before planting: a crowded tuft is different from a deliberate small clump.
Choose single plants if you want the largest possible bulbs. Multisown onions share their immediate space, so individual bulbs are often smaller. That can be convenient when one modest onion is enough for a meal.
Photo: Adoscam, CC BY-SA 4.0. Resized and optimised; cropped for display. Adapted image under the same licence.
Give the crop an open position with direct sunshine. Avoid the shady edge of climbing beans or tall brassicas, especially while the onions' narrow leaves are building the crop.
Remove perennial weeds and improve poor soil with mature compost. A surface dressing suits an established bed managed without digging. Keep the planting surface firm enough to hold small rootballs securely.
Allow roughly 25 to 30cm between clump centres in both directions. Adjust for your final plant count and preferred bulb size. Ordinary single onion spacing is too tight for several plants.
A large container can hold a few clumps. Choose one around 45cm wide and deep, with drainage and suitable peat free compost. Leave access for watering and remove weeds promptly.
Image from the BFFD media library.
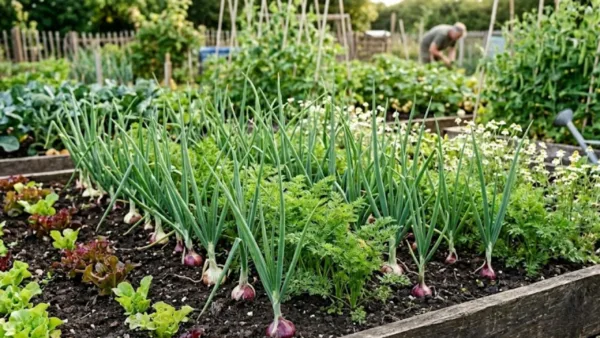
Sow groups deliberately, then transplant the complete rootball. The aim is an even stand of healthy seedlings, not the maximum possible number of seeds in each cell.
1.
Choose fresh bulb onion seed suited to UK growing and your preferred storage period. Label each variety. Salad onion seed may have a different harvest purpose, so check before sowing.
2.
Fill clean modules with moist peat free seed compost. Firm lightly and make a small depression in each cell. Keep the tray level so watering does not shift seeds between cells.
3.
Sow about four to six seeds per module, depending on expected germination. Cover to approximately 1 to 1.5cm or follow the packet. Plan to retain around three to five plants.
4.
Provide the warmth recommended on the packet. After emergence, move seedlings into strong light and cooler, airy conditions. Water gently and empty standing water from trays.
5.
Count the seedlings and snip out surplus plants while small. Keep the chosen group intact. Cells with fewer healthy plants are still useful; note the difference for spacing and harvest records.
6.
Prepare the bed and gradually accustom sheltered plants to outdoor conditions. Start with mild days and extend their time outside. Delay planting while soil is frozen or saturated.
7.
Plant intact clumps about 25 to 30cm apart at approximately their previous depth. Firm around each rootball. Keep seedlings together instead of teasing apart their roots.
8.
Water in and check frequently during establishment. Hand weed close to the plants. Record the sowing date, plants per clump and spacing to help assess your results.

Watering
Keep the root zone evenly moist while leaves and bulbs grow. Several plants draw from the same patch, so check beneath the surface after brief showers. Water at ground level during sustained dry weather.
Reduce and stop routine watering as bulbs mature and foliage falls naturally. Avoid soaking nearly mature onions merely because other crops sharing the bed still need irrigation.

Feeding
Build fertility before planting with mature compost. Balanced early growth is more useful than heavy feeding near harvest. If module plants must wait unusually long, follow the compost supplier's feeding guidance.
Fertile soil may need no extra feed. Investigate moisture, roots and competition before treating weak growth as a shortage. Excess nitrogen can produce soft growth and thick necks that dry poorly.

Pruning
Leave healthy green leaves intact. Do not shorten or fold foliage to force maturity. Remove any flower stalk and mark that onion for early use rather than long storage.
Hoe shallowly between clumps and weed by hand close to bulbs. When taking an early onion from a group, loosen it gently while supporting its neighbours.

Winter care
The usual spring sown crop is harvested before winter. Dry mature bulbs with good airflow, then store sound specimens in breathable trays, nets or plaits. Check regularly and remove decay.
Autumn sowing needs a variety explicitly suited to overwintering. Do not leave ordinary spring seedlings in tiny cells all winter. Choose the season first and follow the variety's instructions.
A multisown group contains several separate onion plants, each with its own hollow leaves and swelling base. The bulbs push apart as they grow. This is a planting method, not a special onion species or a bulb that naturally divides like a shallot.
In mild southern gardens, seedlings may be ready to plant earlier than on an exposed northern allotment. Work with your own soil conditions. Keep waiting plants bright, aired and growing steadily.
In wetter districts, avoid crowded clumps and keep weeds low for airflow. Prepare covered drying space before harvest. A rack in a ventilated shed helps when summer weather turns unsettled.
Judge the crop by its usefulness. If most bulbs are too small, reduce plants per clump or increase spacing next year. If they suit your cooking, larger onions are not automatically better.
Image from the BFFD media library.
Too many seedlings, tight spacing, late establishment or heavy weed competition can all limit size. Count the plants and review the whole growing period. Thin early next time; extra feed near harvest cannot recreate lost spring growth.
Check for insufficient light, saturated compost and poor air movement. Move healthy seedlings to a brighter position and adjust watering. Discard collapsed, rotting seedlings rather than crowding surviving plants together to fill every cell.
White fluffy growth and small black resting bodies may indicate white rot. Remove suspect plants and avoid carrying contaminated soil around the plot. This disease can persist for many years, so a short rotation is not a reliable cure.
Downy mildew can produce pale or purplish growth on affected leaves. Improve airflow, remove affected plants and avoid retaining suspect bulbs for storage. Keep infected material out of home compost and review where future onion crops will grow.
Storage rot may appear after harvest. Keep damaged, bolted or thick necked bulbs out of the main store, dry the crop thoroughly and check it regularly. Separate onions that need eating first so they are not forgotten beneath sound bulbs.
Fresh seed is the straightforward starting point for this method. One seed normally makes one plant and one bulb; the group exists because several seeds were sown together. Putting several purchased onion sets into one small hole is not the same propagation system.
Saving onion seed requires a separate flowering crop in its second year and attention to cross pollination. For a first multisowing trial, purchased seed keeps the experiment manageable. Compare one or two named varieties rather than mixing unidentified seed in the same tray.
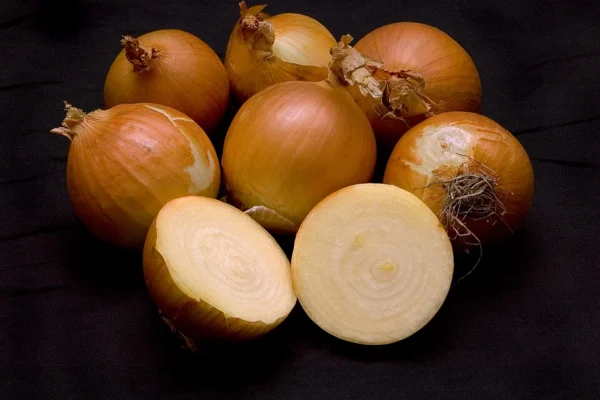
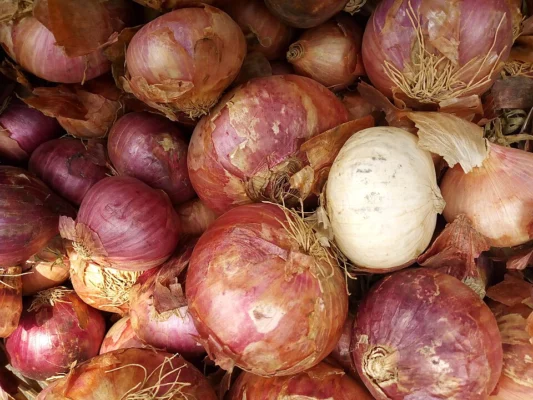
Golden storage onions
Choose a seed variety sold for storage if winter cooking is the aim. The photograph illustrates golden onions; it does not establish a particular cultivar.
Photo: Andrew c at English Wikipedia, CC BY-SA 3.0. Resized and optimised; cropped for display. Andrew c
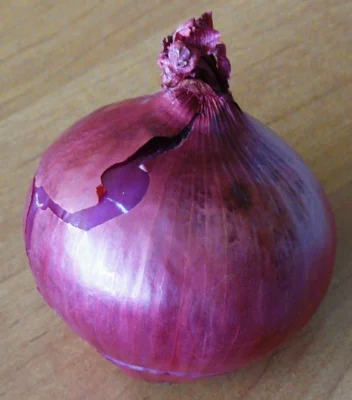
Red Baron
This red bulb onion can be raised from seed. Keep its modules labelled for meaningful harvest records. The original photographer identifies the onion shown as Red Baron.
Photo: MOs810, CC BY-SA 4.0. Resized and optimised; cropped for display. Adapted image under the same licence.
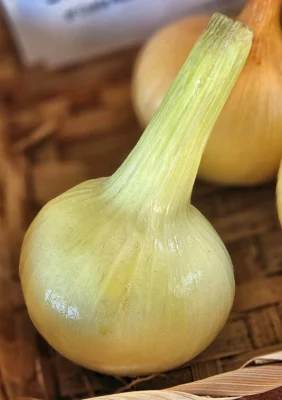
Everyday bulbs or exhibition size?
This large onion illustrates a different growing goal from clustered kitchen bulbs. For size, grow fewer plants with more space. The photograph does not confirm a named variety.
Photo: Eric Polk, CC BY-SA 4.0. Resized and optimised; cropped for display. Adapted image under the same licence.
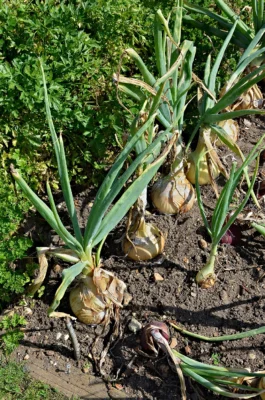
Watch the maturing crop
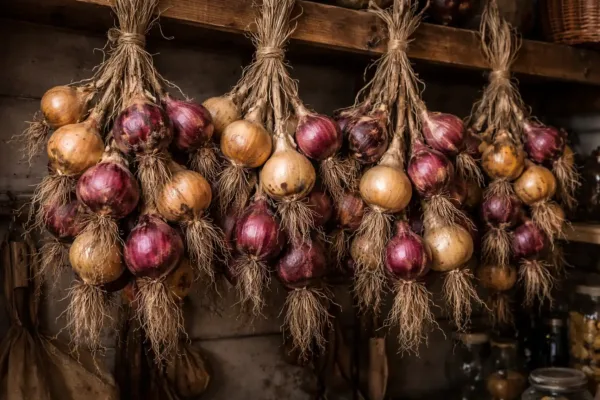
Ripening still depends on variety and conditions. Lift groups as they become ready. These golden onions illustrate maturity; their cultivar and sowing method are unconfirmed.
Photo: JLPC, CC BY-SA 3.0. Resized and optimised; cropped for display. Photo: JLPC / Wikimedia Commons
Keep a note of seeds, surviving plants and spacing. Compare smaller and larger clumps to learn what suits your own bed.
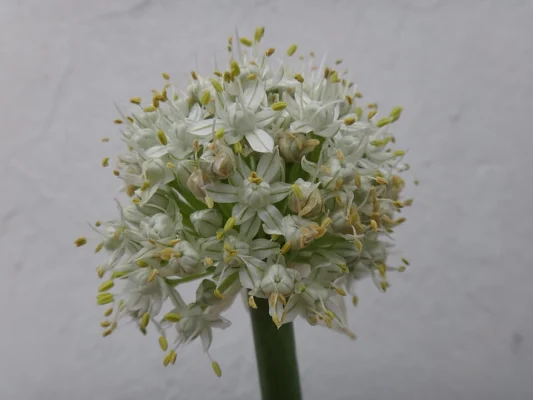
The bulb harvest does not need onions to flower. If you wish to provide flowers for visiting insects, keep a few healthy plants in a separate corner and accept that those bulbs are being used for a different purpose.
Secure protective mesh carefully and inspect beneath it. Avoid loose netting that can trap wildlife. Observe the crop before intervening: not every visiting insect causes harm.
Start with four to six seeds, adjusted for likely germination. Retain roughly three to five healthy plants. Use fewer for larger individual bulbs and remove excess seedlings early.
No. Plant the rooted group intact, with room between clumps. Separating them adds handling and changes the method. Firm gently and water in.
Start with 25 to 30cm between clump centres in each direction. Final plant count, soil fertility and preferred bulb size matter. Clumps need more room than individual onions.
Yes, if you can loosen the chosen bulb without disturbing its neighbours. Support the remaining plants. Use immature onions promptly; let the storage crop mature and dry properly.
No. Multisowing describes growing seedlings together. This guide aims for mature bulbs. Spring onions are harvested younger for slender stems and can be grown at a different density.
They can, if the variety stores well and the bulbs mature soundly. Dry necks, careful handling and cool, airy storage remain essential.
A manageable tray of onion clumps can become a practical kitchen crop. Keep the method simple, give each group room and let the harvest show which bulb size works for your household.
Want to get food independence, support your local grower, get better prices and shop more privately?
Local food isn’t just something you find. It’s something you protect. A free account helps keep local supply visible, supported, and resilient.

….it takes 30 seconds for food lovers and 5 minutes for suppliers
We built this for people who care where their food comes from. For people who want to remain food secure. For Farmers to get to the local people, who deserve a better income and to deliver a better price for you. For the environmentally conscious and the privacy-conscious. An account simply helps us make the map and supplier reach more useful to you, without changing how open it is. You’re always in control.


Find local food. Stay connected to it. Create a free account to support local producers and be part of a growing food network.