Multisowing raises several shallot seedlings together in one small compost plug. Plant the rooted group intact and it develops into a useful cluster of individual bulbs. It is a practical way to handle seed raised shallots, provided you start early enough, keep the seedlings growing steadily and leave room between clumps.
Start from seed
Small groups in modules
Keep rootballs intact
Plant in spring
Harvest in summer
| Crop | Seed raised shallots and suitable banana types |
| Family | Amaryllidaceae |
| Botanical group | Allium cepa; group depends on variety |
| Starting material | Named shallot seed |
| Main sowing window | February to March under cover |
| Seeds per module | About 5 or 6 |
| Final seedlings per clump | About 3 or 4 |
| Sowing depth | Follow the packet, commonly about 1cm |
| Planting outside | Usually March to May when plants are ready |
| Clump spacing | About 20cm apart |
| Row spacing | About 30cm |
| Position | Full sun |
| Soil | Fertile, moist but well drained |
| Root handling | Plant the whole rooted plug |
| Expected bulb count | Usually one bulb per seedling |
| Harvest season | Usually July to September |
| Size control | Fewer plants give each bulb more room |
| Pruning | Keep healthy leaves intact |
| Container option | A large pot with normal clump spacing |
| Storage | Mature and dry bulbs thoroughly |
| Plant name | Crop type | Spacing |
Sow indoors
Plant outdoors
Harvest
Polytunnel | |||||||||||
|---|---|---|---|---|---|---|---|---|---|---|---|---|---|---|
| Jan | Feb | Mar | Apr | May | Jun | Jul | Aug | Sep | Oct | Nov | Dec | |||
| Shallots (Multi sown) | Alliums | Clumps about 20cm apart; rows about 30cm | No activity recorded | Sow indoors, Polytunnel | Sow indoors, Plant outdoors, Polytunnel | Plant outdoors, Polytunnel | Plant outdoors, Polytunnel | No activity recorded | Harvest | Harvest | Harvest | No activity recorded | No activity recorded | No activity recorded |
Sow indoors: February, March. Plant outdoors: March, April, May. Harvest: July, August, September. Polytunnel: February, March, April, May.
Sow in February or March under cover, then plant established clumps outside in spring, usually March to May. The protected band refers to propagation, not a whole season under cover. Harvest normally falls between July and September, depending on sowing date, variety and weather.
Choose this route if you have a bright space for raising seedlings and want to try varieties sold as seed. Moving one rooted plug is simpler than handling every small plant separately. A short trial row is a useful starting point.
A multisown clump is not several shallot sets crowded into one hole. Each seedling usually makes one bulb, whereas a traditional set divides into a cluster. Keeping that distinction clear prevents serious overcrowding.
Photo: Colesman25, CC BY-SA 4.0. Resized and optimised; cropped for display. Adapted image under the same licence.
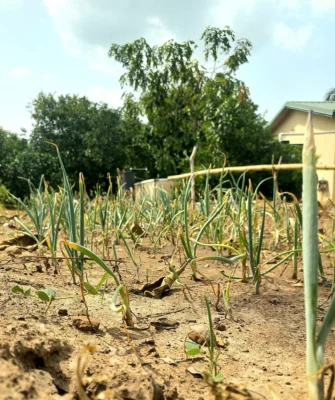
Reserve a sunny bed with access along the rows. Shallots need a good start before summer bulb development, so avoid tucking small clumps into deep shade beside an established crop.
Prepare soil with mature compost where needed and remove persistent weeds. The surface should accept a rooted plug without leaving large air gaps. Work around a wet bed until it becomes fit to plant.
Start with clumps about 20cm apart in rows around 30cm apart. Adjust the final number of seedlings if you prefer larger bulbs. Packing more plants into every plug is not a reliable shortcut to a useful harvest.
Use a broad container at least 30cm deep for a small trial, filled with suitable peat free compost. Retain proper spacing between clumps and check drainage and moisture more frequently than in open ground.
Photo: Arief1802, CC BY-SA 4.0. Resized and optimised; cropped for display. Adapted image under the same licence.

The aim is a small, deliberate group of strong seedlings. Sow into modules, control the number of plants early and transplant before their roots become cramped or growth stalls.
1.
Choose seed of a variety intended for bulb production in the UK. Read its sowing and maturity guidance. Banana shallots such as Zebrune are commonly grown from seed, while many traditional shallots are sold as sets.
2.
Fill clean modules with moist peat free seed compost. Use cells large enough to support several seedlings until planting, with unobstructed drainage holes and a firm label.
3.
Sow about five or six seeds per cell in February or March. Cover at the depth advised on the packet, commonly around 1cm, and water gently without washing the seed together.
4.
Provide a bright place and the germination conditions recommended for the variety. After emergence, favour steady growth and good light over a hot, dim position that produces long, weak leaves.
5.
Once germination is clear, aim for about three or four healthy seedlings in each plug. Remove surplus plants early. Keep a note of how many remain so you can compare eventual bulb size.
6.
Water as needed and move clumps into larger modules if planting is delayed. Do not let a tray sit dry or exhausted for weeks simply because the intended outdoor bed is still occupied.
7.
Acclimatise seedlings gradually to outdoor conditions. Water the tray before planting, then ease out each complete rootball and place it in a prepared hole at roughly its nursery depth.
8.
Space clumps around 20cm apart in rows about 30cm apart. Firm gently and water in. Keep the roots together, label the row and check moisture while the plants establish.

Watering
Small plugs dry out quickly, especially on sunny days under cover. Check the compost regularly and water thoroughly enough to moisten the rootball without leaving the tray permanently standing in water.
After planting, keep moisture reliable while new roots explore the bed. Help the crop through prolonged dry spells, particularly in containers. As bulbs mature and foliage starts to die back, stop routine watering and allow the crop to ripen.

Feeding
Prepare the bed before planting rather than relying on repeated feeds later. If seedlings remain in modules beyond the compost’s useful nutrient supply, a suitable dilute feed can support them while you arrange more root space.
Feed container plants according to the compost and fertiliser instructions during active growth. Do not keep pushing leafy growth as harvest approaches. A weak crop also needs checks for shade, drought, crowding and root damage.

Pruning
Keep the green leaves intact and remove weeds while they are still small. Work carefully around clumps; a deep hoe stroke can damage several bulbs at once.
If a plant produces a flower stalk, remove it and set that bulb aside for early use at harvest. Do not bend healthy leaves over to hurry the whole clump into maturity.

Winter care
This guide starts a new crop in late winter and harvests it in the same year. It is not an instruction to overwinter ordinary seedling clumps outdoors or leave mature bulbs in wet soil.
Store the harvested crop in a cool, dry, ventilated place after thorough curing. Check it through winter and remove any bulb that softens or develops mould before it spoils its neighbours.
Several narrow green shoots emerge from each module, followed by distinct bulbs around the outside of the clump. The group reflects the seedlings you retained, rather than one original set multiplying.
Shallots differ in skin colour and shape. Some elongated kitchen types, including Zebrune, are classified with bulb onions in the Cepa Group. The photos illustrate shallots and bulb forms; they do not establish the seed variety or multisowing method used.
Photo: Okkisafire, CC BY-SA 4.0. Resized and optimised; cropped for display. Adapted image under the same licence.
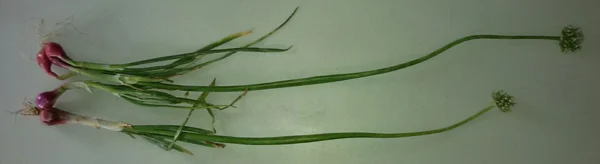
A protected February or March start gives seedlings time to develop before spring planting. In a cold district, use plant strength and workable soil to guide transplanting rather than forcing tiny plugs outside on a fixed date.
In mild areas, clumps may be ready earlier, but bright conditions still matter. A warm windowsill with weak light is not automatically better than a cooler, properly managed propagation space.
Expect harvest broadly from July to September. Wait for natural yellowing and falling leaves, loosen the clump carefully and separate bulbs without bruising them. Dry under cover if the weather will not provide a reliable dry spell.
Photo: GLEVIG76, CC BY-SA 4.0. Resized and optimised; cropped for display. Adapted image under the same licence.
Check the amount of light and the temperature. Move the tray to a brighter suitable position, avoid unnecessary warmth after germination and check that the roots have moisture and enough compost.
Too many retained seedlings, close spacing or checked spring growth can leave undersized bulbs. Reduce plant numbers next time and keep the crop growing steadily. More seeds do not guarantee more usable kitchen produce.
Dry plugs, damaged roots and an abrupt move outdoors can all cause setbacks. Water before planting, harden plants off and move complete rootballs into suitable soil.
Inspect for disease as well as moisture and root problems. Humid, crowded growth favours downy mildew. Remove badly affected material, allow airflow and keep suspect bulbs out of long storage.
Look for damp necks, harvest damage or decay that began in the bed. Cure sound bulbs thoroughly, store with ventilation and inspect regularly. Diseased bulbs should not become planting stock.
Multisowing begins with seed. Keep each variety labelled and use fresh, well stored seed for dependable germination. The number of healthy seedlings retained largely determines how many bulbs the clump can produce.
Saving seed is a separate project and may not reproduce an F1 variety faithfully. Buying a named packet keeps the crop predictable. Do not assume that planting a harvested banana shallot next year will give the same result as traditional multiplying sets.
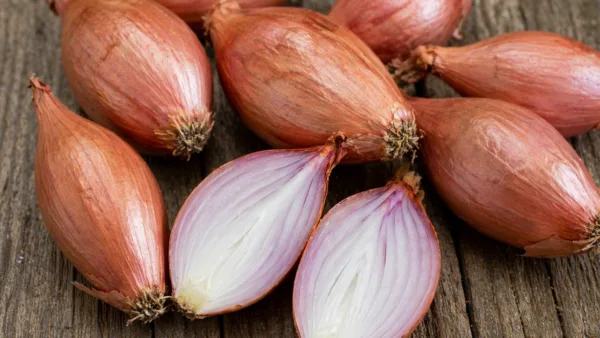
Choose a seed raised kitchen type
Read whether the variety is offered as seed or sets before planning your modules. These whole and halved shallots illustrate a useful kitchen form, without claiming a named cultivar.
Image from the BFFD media library.
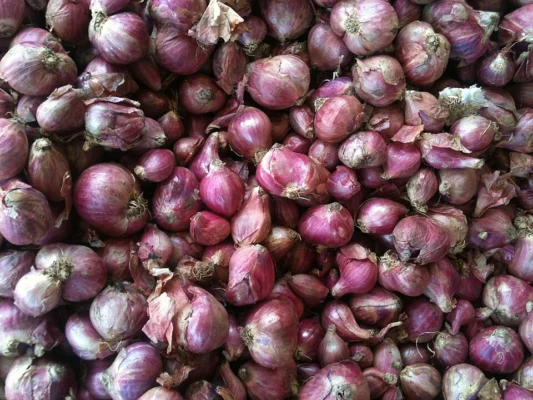
Compare colour and bulb size
Seed varieties can differ in skin colour, shape and eventual size. Select for the way you cook and the length of season available. The small red bulbs shown are not verified as a particular seed variety.
Photo: Ask27, CC BY-SA 3.0. Resized and optimised; cropped for display. Adapted image under the same licence.
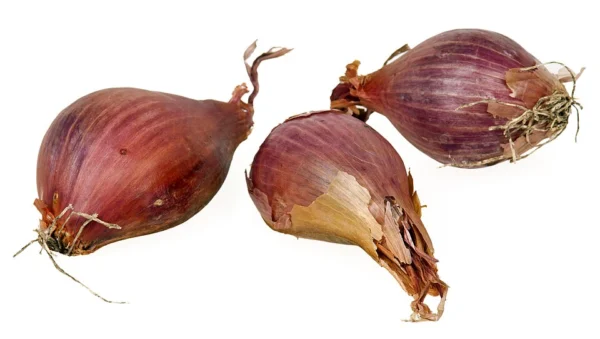
A shallot set is a different start
A traditional set can divide into several bulbs and should be given space of its own. The photograph of whole shallots is a comparison of bulb form, not a recommendation to plant several sets together.
Photo: Evan-Amos, CC BY-SA 3.0. Resized and optimised; cropped for display. Adapted image under the same licence.
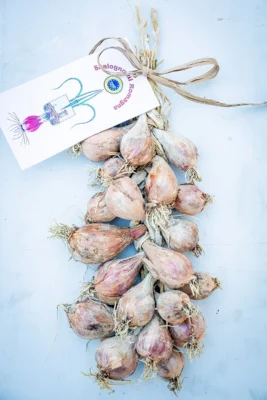
Banana types and traditional shallots
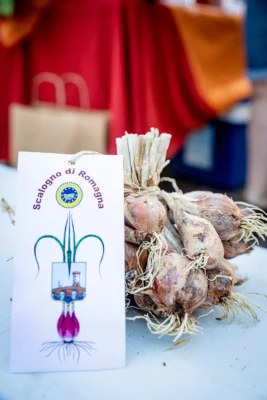
Zebrune is one seed raised elongated type, classified in the onion Cepa Group. The photograph shows Scalogno di Romagna shallots rather than a verified Zebrune crop; similar outlines do not make varieties interchangeable.
Photo: GLEVIG76, CC BY-SA 4.0. Resized and optimised; cropped for display. Adapted image under the same licence.
Try a short row with three or four seedlings per plug and record the harvest. That gives you a practical basis for choosing next year’s spacing and plant numbers.
If local allium pests make a cover necessary, fit suitable insect mesh before damage occurs and keep the edges secure. Inspect beneath it rather than assuming a covered crop needs no attention.
Bulbs for the kitchen are generally harvested before flowering. Keep any plants deliberately retained for flowers separate from the main crop, and avoid loose netting around the growing area.
About five or six allows for some failures. Aim to retain roughly three or four healthy seedlings, adjusting downwards if you prefer larger bulbs.
No. Plant the rooted plug intact so the seedlings continue as a small group. Give the whole clump enough space and water it in well.
Usually each seedling makes one bulb in that crop. Traditional shallot sets are different: one planted set normally divides into several bulbs.
That is not this method. Several multiplying sets in one hole can become badly crowded. Plant sets individually at suitable spacing, or use seed to raise deliberate seedling clumps.
February to March under cover is a useful UK starting window. Follow the seed packet and aim for strong plants ready to move outside in spring.
Keep fewer seedlings per clump, allow adequate spacing and avoid checks from drought, weeds or exhausted modules. Variety and season also affect the final size.
A good multisown shallot crop starts with a manageable group of seedlings. Give the clumps light, timely planting and steady care, then finish with a careful lift and patient drying.
Want to get food independence, support your local grower, get better prices and shop more privately?
Local food isn’t just something you find. It’s something you protect. A free account helps keep local supply visible, supported, and resilient.

….it takes 30 seconds for food lovers and 5 minutes for suppliers
We built this for people who care where their food comes from. For people who want to remain food secure. For Farmers to get to the local people, who deserve a better income and to deliver a better price for you. For the environmentally conscious and the privacy-conscious. An account simply helps us make the map and supplier reach more useful to you, without changing how open it is. You’re always in control.


Find local food. Stay connected to it. Create a free account to support local producers and be part of a growing food network.