Garden cress is one of the quickest ways to put something home grown on a plate. A small tray on a bright windowsill can provide peppery shoots within a week or two, and repeated sowings keep the supply fresh. The familiar seedling crop is only one stage of Lepidium sativum: plants grown in soil can develop larger leaves, flowers and seed.
Quick salad crop
Year round indoors
Good for small spaces
Sow small batches
Garden cress, not watercress
| Botanical name | Lepidium sativum |
| Family | Brassicaceae |
| Common names | Garden cress or salad cress |
| Life cycle | Annual |
| Main indoor crop | Young shoots and seed leaves |
| Flavour | Peppery or mustard-like |
| Indoor sowing | Any month with adequate light and warmth |
| Outdoor option | Summer sowings for larger leaves |
| Sowing method | Scatter thinly on a moist surface |
| Indoor growing surface | Seed compost, kitchen paper or cotton wool |
| Useful germination conditions | Around 18°C and steady moisture |
| Germination | Usually within a few days |
| Seedling harvest | Often 7 to 14 days from sowing |
| Cutting height | Around 3 to 5cm of healthy growth |
| Seedling spacing | Thin, even broadcast sowing |
| Transplanting | Normally unnecessary |
| Feed for a short shoot crop | Usually unnecessary |
| Succession | Repeat small sowings every 1 to 2 weeks |
| Plant name | Crop type | Spacing |
Sow indoors
Plant outdoors
Harvest
Polytunnel | |||||||||||
|---|---|---|---|---|---|---|---|---|---|---|---|---|---|---|
| Jan | Feb | Mar | Apr | May | Jun | Jul | Aug | Sep | Oct | Nov | Dec | |||
| Cress | Salad & leaves | Single thin broadcast sowing for shoots, In row thinly sown, Row gap not applicable to trays | Sow indoors, Harvest | Sow indoors, Harvest | Sow indoors, Harvest | Sow indoors, Harvest | Sow indoors, Harvest | Sow indoors, Harvest | Sow indoors, Harvest | Sow indoors, Harvest | Sow indoors, Harvest | Sow indoors, Harvest | Sow indoors, Harvest | Sow indoors, Harvest |
Sow indoors: January, February, March, April, May, June, July, August, September, October, November, December. Plant outdoors: no months recorded. Harvest: January, February, March, April, May, June, July, August, September, October, November, December. Polytunnel: no months recorded.
All twelve sowing and harvesting months refer to short indoor crops with adequate light and warmth, not continuous outdoor production. Cress is normally sown where it will be cut, so no transplanting band is shown. A polytunnel is optional equipment rather than a requirement for a windowsill crop.
A small container is enough for a sandwich garnish, making cress useful for people without a garden. It also lets a beginner observe germination and cutting without waiting a whole season.
Plan for a short crop and sow again. A tray cut very low at the seedling stage should not be expected to produce endless repeat harvests.
Photo: Stefan.lefnaer, CC BY-SA 4.0. Resized and optimised; cropped for display. Adapted image under the same licence.
Use a bright indoor position that does not become fiercely hot against the glass. A shallow tray can dry rapidly on a sunny sill, especially above a radiator.
For a simple shoot crop, clean kitchen paper or cotton wool can hold the moisture needed during early growth. Compost gives roots more support if you want plants to develop further.
Outdoors, use a small prepared patch or container during suitable summer weather. Keep the seed zone moist and make modest sowings that you can harvest promptly.
Put the crop where checking it becomes part of the day. Small containers have little reserve, so accessibility matters more than an elaborate propagating setup.
Photo: Krish Dulal, CC BY-SA 3.0. Resized and optimised; cropped for display. Adapted image under the same licence.
Use seed sold for edible cress growing and a clean container. For the quickest routine, sow directly onto the final growing surface.
1.
Choose a shallow clean tray, pot or food container and prepare a small amount of seed. Label it with the sowing date.
2.
Moisten fresh seed compost, plain kitchen paper or cotton wool evenly. Let surplus water drain so the seeds will not sit in a puddle.
3.
Scatter seeds in a thin, even layer. Avoid thick overlapping heaps that are difficult to keep evenly moist.
4.
Press seeds lightly into contact with the surface. Follow the packet’s covering instructions rather than burying them deeply.
5.
Keep the tray gently warm during germination, then give emerged shoots good light. Remove a temporary germination cover once it is no longer needed.
6.
Check moisture daily and add water gently so seedlings are not flattened or washed into clumps.
7.
When healthy shoots are around 3 to 5cm tall, cut above the growing surface with clean scissors. Wash the harvested cress before use.
8.
Clear the used crop, wash the container and sow a fresh batch. Start the next tray earlier if you want an overlapping supply.

Watering
Keep the growing surface moist throughout the short crop. Paper and cotton wool can become dry before the seedlings look obviously stressed, so inspect the surface as well as the leaves.
Add small amounts carefully and avoid a permanently flooded tray. A light spray or gentle watering at the edge can be easier to control than pouring directly over fragile shoots.

Feeding
A quick seedling crop normally needs no added feed. The first growth is supported by the seed’s reserves, which is why a short crop can be raised without compost.
For larger plants, use suitable growing compost or prepared garden soil. Do not try to maintain mature cress indefinitely on an exhausted paper pad by repeatedly adding strong fertiliser.

Pruning
For the familiar salad crop, harvesting is a single close cut of young shoots. Keep the scissors above compost or fibres so these are not mixed into the food.
If growing larger plants for leaves, harvest modestly while growth remains tender. Flowering changes the purpose of the crop, so begin another sowing when young leaves are your priority.

Winter care
Indoor cress can be sown in winter, but low light and cold glass slow growth. Use a bright position and move trays away from a very cold window overnight if necessary.
Keep batches small enough to use promptly. The year round calendar assumes a suitable indoor environment and should not be read as a promise of outdoor winter cropping.
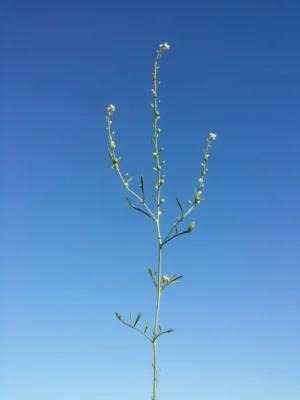
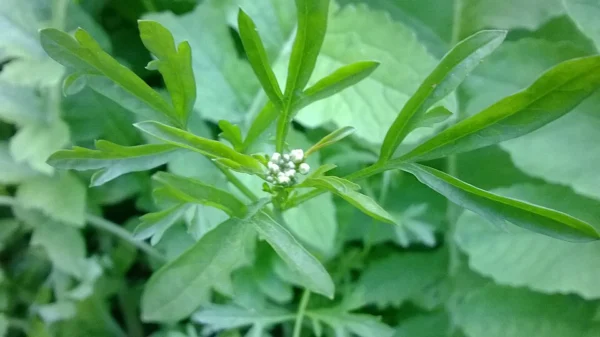
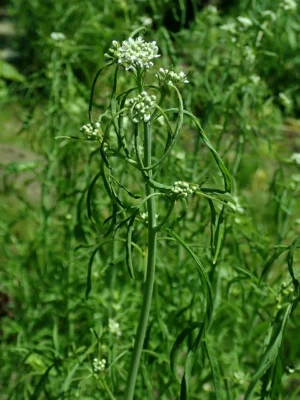
Garden cress seedlings make the small green shoots familiar from salad punnets. Left in soil, the plant develops more divided leaves and upright stems carrying small white flowers and seed pods.
Garden cress is different from watercress and from American or land cress. Read the botanical name on the packet: this page is for Lepidium sativum, not a guide to identifying wild plants.
Photo: Salicyna, CC BY-SA 4.0. Resized and optimised; cropped for display. Adapted image under the same licence.
For an indoor crop, the conditions on the windowsill matter more than a national planting date. A warm bright room in northern Britain can be more suitable than a cold shaded sill farther south.
For outdoor summer crops, sow little and often and protect the surface from drying. Leaves become larger and can have a stronger flavour than the familiar indoor shoots.
For a family growing project, use clean containers and keep decorations clear of the growing surface. Record the first root, first leaves and harvest date to make each sowing useful as well as edible.
Photo: Challiyan, CC BY-SA 4.0. Resized and optimised; cropped for display. Adapted image under the same licence.
Move it away from intense heat and check more frequently. If seedlings have collapsed and deteriorated, start a fresh batch rather than expecting damaged shoots to recover fully.
Improve the light after germination and reduce crowding. A dim position encourages long weak stems rather than sturdy green shoots.
Discard a spoiled crop and clean the container before starting again. Sow less densely, avoid standing water and remove unnecessary covers after germination.
Check that seed made contact with an evenly moist surface. Old seed, dry patches or seed piled in thick clumps can all produce an uneven result.
A mature annual naturally moves into seed production, especially as the season progresses. Harvest younger leaves promptly and keep fresh sowings coming if a salad crop is the aim.
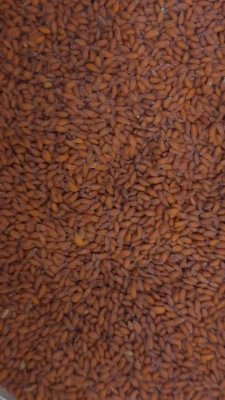
Garden cress is raised from seed. Keep unused packets dry and labelled, and sow only what you expect to eat while fresh. A series of small trays makes better use of seed than one oversized batch.
For an outdoor seed project, leave selected plants in soil to flower and mature. Collect ripe dry seed into labelled paper containers and finish drying before storage. This is a longer project than raising a punnet of shoots.
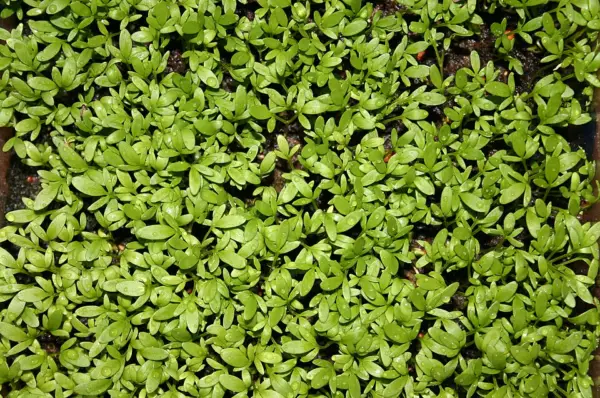
Plain cress
A familiar choice for quick indoor shoots, with a straightforward peppery flavour. It can also be sown outside for a larger leaf crop in suitable weather.
Illustrative garden cress seedlings; the exact selection is not recorded.
Photo: Till Westermayer, CC BY-SA 3.0. Resized and optimised; cropped for display. Adapted image under the same licence.
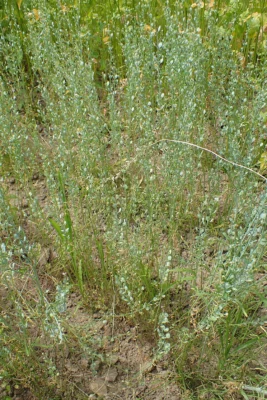
Curled selections
Curled cress gives a different leaf texture. Fine Curled and Extra Triple Curled are names you may encounter when comparing packets.
Extra Triple Curled plants left to reach the mature seed-bearing stage.
Photo: Krzysztof Ziarnek, Kenraiz, CC BY-SA 4.0. Resized and optimised; cropped for display. Adapted image under the same licence.
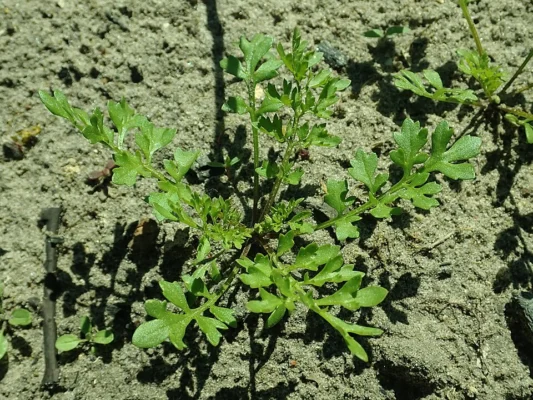
Fast indoor batches
Selections such as Sprint are sold for rapid punnet production. Check the growing conditions rather than assuming the name guarantees an identical harvest date in every room.
Illustrative garden cress outdoors; not confirmed as Sprint.
Photo: Salicyna, CC BY-SA 4.0. Resized and optimised; cropped for display. Adapted image under the same licence.
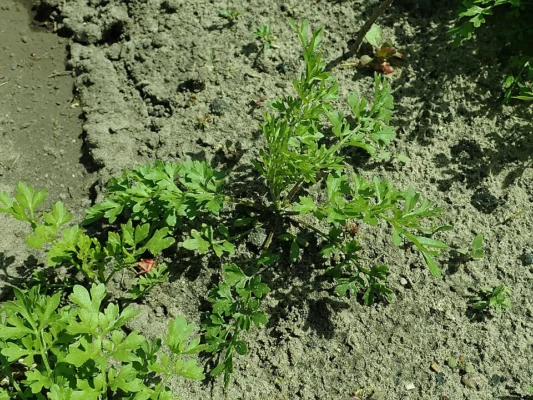
Larger outdoor leaves
A summer sowing in soil lets plants develop beyond the seedling stage. Allow room as they expand and harvest while leaves are useful for your intended dish.
Garden cress foliage growing in a soil bed.
Photo: Salicyna, CC BY-SA 4.0. Resized and optimised; cropped for display. Adapted image under the same licence.
Look for labelled garden cress seed intended for edible growing. Plain or curled types both suit a simple start. Store the remaining seed carefully and set aside a clean tray for the next batch.
A windowsill crop is harvested before flowering, so it contributes little directly to garden pollinators. Separate outdoor plants can be allowed to flower if there is space to observe them.
Avoid routine pest treatments on a short indoor crop. Keeping the growing area clean and replacing a failed batch is usually more practical than trying to rescue deteriorating seedlings.
Published by Buy From Farmers Direct. Sources checked 6 October 2026. Growing references: RHS growing cress activity; Natural History Museum: growing cress; RHS Plants: common plain cress; Kings Seeds: plain cress; Kings Seeds: Sprint cress; Fothergill’s: Fine Curled cress. The seasonal timeline uses the shared BFFD Growers Calendar record; adjust timings to your variety and local conditions.
Young shoots are often ready within 7 to 14 days, depending on warmth, light and the seed. Harvest by their healthy growth rather than the date alone.
Yes, for a short seedling crop. Moist kitchen paper or cotton wool can support that early stage. Use compost or soil if you want larger, longer lived plants.
Yes, indoors where light and warmth are adequate. The year round calendar does not mean an outdoor tray will grow equally well through winter.
A closely cut seedling tray is best treated as a single crop. Sow fresh small batches for a dependable supply rather than relying on repeated regrowth.
No. Garden cress is Lepidium sativum. Watercress and land cress are different plants with different growing requirements.
Discard spoiled cress, clean the container and start with fresh growing material. Use a thinner sowing, avoid standing water and remove covers after germination.
A clean tray, steady moisture and a bright position are enough to get started. Sow small amounts regularly and use the shoots while they are fresh.
Want to get food independence, support your local grower, get better prices and shop more privately?
Local food isn’t just something you find. It’s something you protect. A free account helps keep local supply visible, supported, and resilient.

….it takes 30 seconds for food lovers and 5 minutes for suppliers
We built this for people who care where their food comes from. For people who want to remain food secure. For Farmers to get to the local people, who deserve a better income and to deliver a better price for you. For the environmentally conscious and the privacy-conscious. An account simply helps us make the map and supplier reach more useful to you, without changing how open it is. You’re always in control.


Find local food. Stay connected to it. Create a free account to support local producers and be part of a growing food network.