Shallots bring a useful harvest to a modest patch of ground, with small bulbs that suit roasting, sauces and everyday cooking. The easiest start is a handful of sets: each planted bulb develops into a cluster. Seed gives another route, particularly for long banana types, but needs an earlier start and a little more attention. Give the crop sunshine, clear ground and time to dry properly after lifting, and the harvest can continue supplying the kitchen well beyond summer.
Easy start from sets
Sun and good drainage
Spring or suitable autumn planting
Summer bulb harvest
Dry thoroughly before storing
| Botanical group | True shallots: Allium cepa Aggregatum Group |
| Family | Amaryllidaceae |
| Crop type | Edible bulbs, usually grown as an annual crop |
| Simplest starting material | Healthy shallot sets |
| Set-grown harvest | A cluster of bulbs from each set |
| Seed-grown harvest | Usually one bulb per seedling |
| Main set planting | February to April, as conditions allow |
| Optional autumn planting | October and November with suitable sets |
| Indoor seed sowing | Late winter, usually February or March |
| Outdoor seed sowing | Mid-spring in warming soil |
| Position | Full sun with good air circulation |
| Soil | Fertile, moisture retentive and freely drained |
| Set spacing | 15 to 20cm apart |
| Row spacing | 25 to 30cm apart |
| Set planting depth | Tip just visible at the soil surface |
| Direct-sown seed depth | About 1.5cm |
| Container starting size | At least 30cm wide and deep |
| Main harvest | July to September, depending on start and variety |
| Harvest signal | Leaves yellow and fall over naturally |
| Storage requirement | Sound bulbs with fully dried necks and skins |
| Plant name | Crop type | Spacing |
Sow indoors
Plant outdoors
Harvest
Polytunnel | |||||||||||
|---|---|---|---|---|---|---|---|---|---|---|---|---|---|---|
| Jan | Feb | Mar | Apr | May | Jun | Jul | Aug | Sep | Oct | Nov | Dec | |||
| Shallots | Alliums | Single 20cm, In row 20cm, Row gap 30cm for sets or small seedling clumps | No activity recorded | Sow indoors, Plant outdoors | Sow indoors, Plant outdoors | Sow indoors, Plant outdoors | No activity recorded | No activity recorded | Harvest | Harvest | Harvest | Plant outdoors | Plant outdoors | No activity recorded |
Sow indoors: February, March, April. Plant outdoors: February, March, April, October, November. Harvest: July, August, September. Polytunnel: no months recorded.
The February-April sowing band combines late-winter indoor seed raising with mid-spring outdoor sowing. February-April is the main set-planting window; October-November is an optional second window for sets specifically sold for autumn planting in freely drained ground. Seed-raised plants go out in spring after hardening off. July-September harvest covers differing starts and varieties; judge the foliage and bulbs rather than the calendar alone. There is no routine polytunnel crop band: an early indoor seed start does not mean the crop needs a tunnel all season.
Shallots suit a vegetable bed, raised bed or generously sized container where the plants can receive plenty of light. A short row gives you a manageable crop to lift, dry and use, without committing a whole allotment bed.
Choose sets if you want the most straightforward start. Seed offers different varieties and can work well where you have a bright place to raise seedlings. Do not expect a seed-grown banana type to multiply into the same cluster as a traditional shallot set.
Photo: Colesman25, CC BY-SA 4.0. Resized and optimised; cropped for display. Adapted image under the same licence.
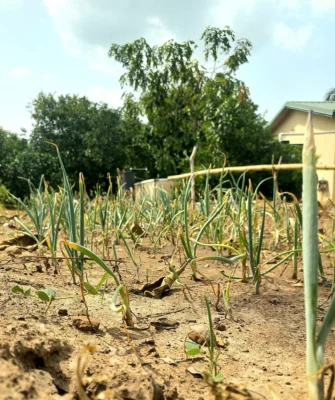
Pick an open sunny position rather than a sheltered damp corner. The narrow leaves do little to shade out weeds, so access for regular hand weeding matters as much as fitting the bulbs into a small space.
Prepare the bed with well-rotted compost before planting. Aim for soil that holds useful moisture without remaining saturated. On a wet plot, a properly drained raised bed or large container is a better starting point.
Keep shallots within the allium part of your crop rotation, alongside onions, garlic and leeks. Where white rot has occurred, an ordinary short rotation will not make the ground safe; use a clean growing area and avoid moving contaminated soil.
For pots, use a container at least 30cm wide and deep with drainage holes and peat free soil-based compost. Keep normal spacing rather than filling the surface with touching sets. A few well-spaced clusters are easier to care for than an overcrowded pot.
Photo: Arief1802, CC BY-SA 4.0. Resized and optimised; cropped for display. Adapted image under the same licence.

Buy firm, sound sets labelled for the intended planting season, or fresh seed of a named variety. Discard soft or mouldy sets before they reach the bed. The following method uses sets, with the seed option explained separately below.
1.
Check the supplier’s planting window. Spring is the simpler choice on cold or heavy ground; reserve autumn planting for appropriate sets and a site that drains well through winter.
2.
Remove perennial weeds and prepare a level surface. Work the ground only when it is workable, rather than pressing sets into sticky, saturated soil.
3.
Mark rows about 25 to 30cm apart and leave 15 to 20cm between sets. Give each starting bulb room for the cluster that will develop around it.
4.
Plant each set with its root end down and its pointed tip just visible. Make a small hole first if needed, so you do not damage the base by forcing it into firm soil.
5.
Firm gently and water to settle the roots. Label the row with the variety and date, especially if you are comparing spring-planted and overwintered crops.
6.
Check for sets lifted by birds before they root. Replant displaced bulbs; if necessary, use secure, well-supported mesh or fleece temporarily, keeping loose material away from wildlife.
7.
Keep the crop weed free and water during prolonged dry spells while growth is active. As the bulbs finish swelling and foliage begins to mature, reduce watering rather than encouraging fresh soft growth.
8.
Lift when leaves yellow and fall naturally. Ease the clusters out with a fork, separate the bulbs carefully and dry the sound harvest in a single airy layer before putting it into storage.

Watering
Once rooted in the ground, shallots usually manage ordinary weather without constant watering. During prolonged early-summer dryness, water the soil around the plants so bulb growth does not stall.
Containers dry more quickly and need closer checks. Avoid wetting the leaves repeatedly, and stop routine watering as mature bulbs ripen; keeping the crop wet at that stage makes good storage more difficult.

Feeding
A bed prepared with well-rotted organic matter often needs little extra feeding. If growth on poor soil needs support, use a suitable fertiliser at its stated rate while the crop is actively growing.
Potted plants may need occasional general liquid feed through spring and early summer. Avoid heavy nitrogen feeding late in the season, when the aim is a firm, mature bulb with a neck that can dry properly.

Pruning
Shallots do not need routine leaf trimming. Keep the foliage intact to support the developing bulbs, and do not bend it over to hurry ripening. The natural yellowing and collapse of mature leaves is a useful harvest signal.
If a flower stem appears, cut it out promptly and mark the plant. Its bulbs are better used soon after harvest than kept for long storage, even after the flower stem has been removed.

Winter care
For an autumn-planted crop, keep drainage clear and watch for waterlogging. A hardy variety cannot compensate for a bulb sitting in saturated ground. Check that covers remain secure and remove unnecessary protection when it restricts airflow.
Stored shallots need cool, dry, airy conditions. Allow roughly two weeks for initial drying in suitable weather, longer if necessary, until necks and foliage are papery. Use net bags or shallow trays and check regularly, removing any bulbs that soften, rot or sprout.
Shallots grow narrow, hollow onion-like leaves from a bulb at ground level. Traditional set-grown plants gradually separate into a visible cluster, which becomes easier to see as the crop matures.
Bulbs may be rounded, teardrop shaped or long, with golden, pinkish or red skins. “Banana shallot” describes an elongated kitchen type; some seed-grown examples, including Zebrune, are classified with bulb onions. Use the variety label to confirm what you have planted.
Photo: Okkisafire, CC BY-SA 4.0. Resized and optimised; cropped for display. Adapted image under the same licence.
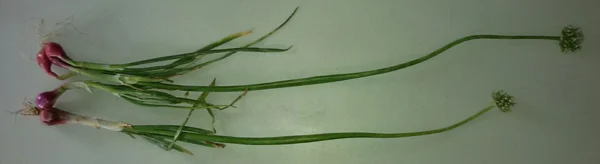
In many UK gardens, spring planting is dependable because it avoids the wettest part of winter. Wait for workable soil, particularly on clay or in colder districts, while still giving plants time to make good leaf growth before summer.
Autumn planting can make productive use of an empty bed, but it is a variety and site choice. Follow the set supplier’s instructions and avoid treating every shallot as suitable for overwintering.
Plan somewhere covered and ventilated for harvest time. If rain interrupts drying outdoors, move the bulbs to an airy shed or greenhouse rather than packing them away with damp necks. Protect them from rain without trapping moisture around the crop.
Photo: GLEVIG76, CC BY-SA 4.0. Resized and optimised; cropped for display. Adapted image under the same licence.
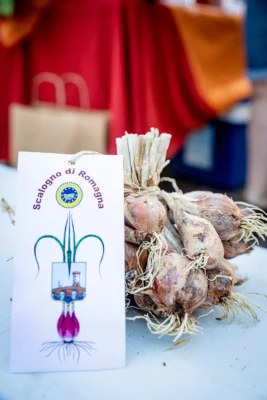
Cold exposure and other stresses can trigger bolting. Remove stems early, use suitable planting material and follow its season. Mark affected plants so their bulbs are used first rather than included in the long-term store.
White rot can produce fluffy growth with tiny black resting bodies around rotting roots and bulbs. Remove affected plants and avoid carrying their soil elsewhere. The fungus survives for many years, so a short crop rotation is not an adequate remedy.
Downy mildew is favoured by humid conditions and crowded growth. Improve airflow through sensible spacing and weed control. Remove badly affected plants and infected debris, and do not retain suspect bulbs for planting or storage.
Allium leaf miner can leave feeding marks, tunnels and small brown pupae inside affected tissue. Where it is troublesome, use insect-proof mesh during adult activity and rotate the crop so insects cannot emerge from beneath the cover.
Neck rot may become visible only after the crop has been stored. Remove decaying bulbs promptly. Next season, avoid bruising at harvest, dry necks thoroughly and keep damaged or thick-necked bulbs for immediate use if otherwise sound.
For seed raising, sow in modules in late winter and keep them bright and suitably warm. A few seedlings can be grown together as a small clump, then hardened off and planted without separating their roots. Direct sowing is also possible in warming mid-spring soil, about 1.5cm deep; thin gradually to around 10cm for individual bulbs.
Traditional shallots can be maintained by keeping sound bulbs from a healthy crop for replanting. Do not save planting material from a bed with suspected disease. Newly purchased healthy sets are a sensible restart when the crop’s history is uncertain; seed saving needs its own flowering season and variety planning.
Golden Gourmet
A traditional golden-brown shallot grown from sets, producing useful clusters of relatively large bulbs. Its mild flavour suits everyday cooking and it keeps well when mature and properly dried. Buy stock labelled for your intended spring or autumn planting season.
Illustrative shallots; the photograph is not verified as Golden Gourmet.
Image from the BFFD media library.
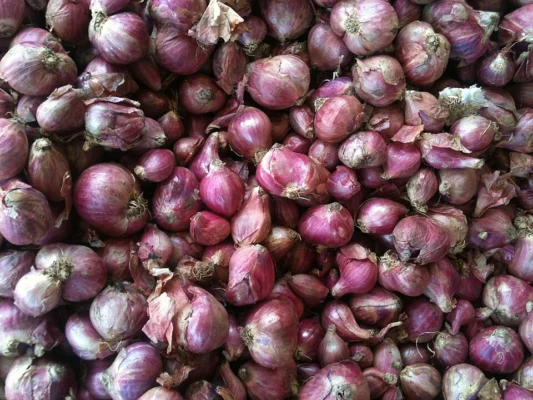
Red Sun
A set-grown variety with rounded copper-red bulbs. It provides a colour contrast to golden types and is valued for storing after careful curing. Give each set enough room for its cluster rather than planting it like a small individual onion.
Illustrative shallots; the photograph is not verified as Red Sun.
Photo: Ask27, CC BY-SA 3.0. Resized and optimised; cropped for display. Adapted image under the same licence.
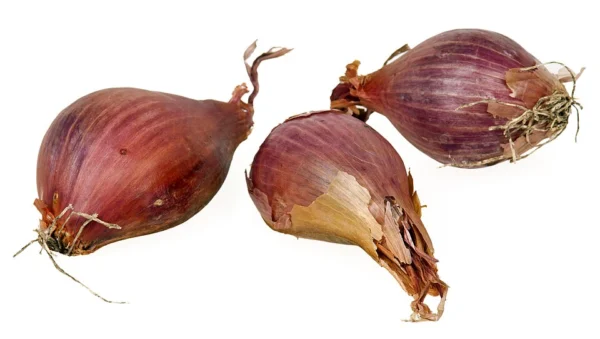
Jermor
An elongated French shallot grown from sets, useful when you prefer longer bulbs for slicing and cooking. Its narrow shape does not mean it needs no growing room: the starting set still forms a cluster. Follow the supplier’s seasonal instructions.
Illustrative shallots; the photograph is not verified as Jermor.
Photo: Evan-Amos, CC BY-SA 3.0. Resized and optimised; cropped for display. Adapted image under the same licence.
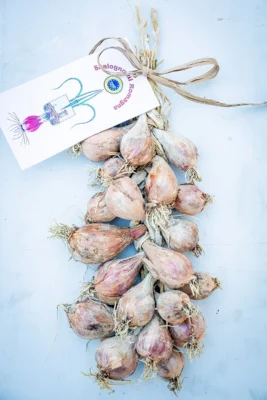
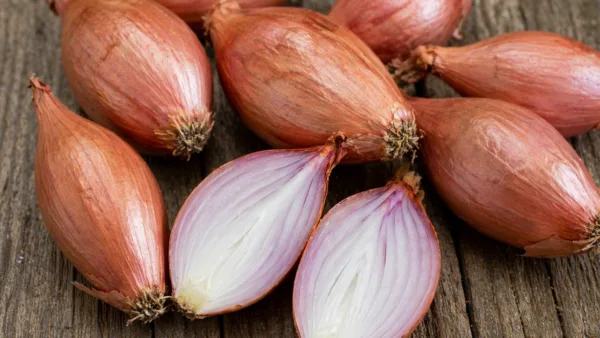
Zebrune
A seed-grown torpedo type often sold as a banana shallot, with pinkish-brown skins. Botanically it is placed in the onion Cepa Group. Start seed early enough to make strong plants, and expect individual bulbs rather than a multiplying cluster from each seed.
Illustrative elongated shallots; the photograph is not verified as Zebrune.
Photo: GLEVIG76, CC BY-SA 4.0. Resized and optimised; cropped for display. Adapted image under the same licence.
Check whether you are buying sets, seeds or young plants, then compare the planting window and eventual bulb shape. A small quantity of sound sets is an easy beginning. Buy only enough to plant promptly and leave sufficient space for the clusters to develop.
Insect mesh and temporary bird protection work best when fitted securely and inspected regularly. Avoid leaving loose netting around the bed, and remove it when the particular risk has passed.
The bulb crop is normally harvested before flowering. Grow chives or other suitable flowers nearby if you want to provide insect forage, keeping a dedicated seed-saving plant separate from bulbs intended for good storage.
Published by Buy From Farmers Direct. Growing guidance reviewed 6 October 2026. The seasonal timeline uses the shared BFFD Growers Calendar record; adjust timings to your variety and local conditions.
A traditional shallot set usually forms a cluster. Seed-grown plants generally make one bulb per seedling, so several seedlings grown together give a clump of individual bulbs. Check which starting method your variety uses.
February to April is a practical main window for sets, once soil is workable. Suitable stock can also be planted in autumn on well-drained ground. Follow the supplier’s dates and avoid autumn planting in waterlogged soil.
Yes. Use a drained container at least 30cm wide and deep, with peat free soil-based compost. Keep proper spacing and check moisture more often than you would in a garden bed.
The foliage begins to yellow and falls over naturally, usually in summer. Lift carefully with a fork and avoid bruising the bulbs. Do not bend green leaves over simply to force the crop to ripen.
Possible causes include damp necks, harvest damage or an infection carried into store. Dry bulbs thoroughly before storage, keep them cool and well ventilated, and remove any that soften or develop mould.
Zebrune is commonly sold as a banana shallot for kitchen use, but is classified with bulb onions in the Cepa Group. It is raised from seed and should not be expected to make the same multiplying cluster as a traditional shallot set.
Start with healthy material, plant into sunny well-drained ground and keep weeds under control. A careful lift and patient drying period are the final steps that turn a summer shallot harvest into a useful store for later meals.
Want to get food independence, support your local grower, get better prices and shop more privately?
Local food isn’t just something you find. It’s something you protect. A free account helps keep local supply visible, supported, and resilient.

….it takes 30 seconds for food lovers and 5 minutes for suppliers
We built this for people who care where their food comes from. For people who want to remain food secure. For Farmers to get to the local people, who deserve a better income and to deliver a better price for you. For the environmentally conscious and the privacy-conscious. An account simply helps us make the map and supplier reach more useful to you, without changing how open it is. You’re always in control.


Find local food. Stay connected to it. Create a free account to support local producers and be part of a growing food network.